Showing posts with label Cheese. Show all posts

Thursday, November 6, 2014

Quick, two pan Chicken Alfredo

I've been working long hours lately and have no desire to cook when I get home, let alone do the dishes afterwards. My solution for nights like these? A quick pasta. If I count all the prep dishes and my bowl and spoon to eat with, I get under 10 dishes to wash. (I'm talking  cutting boards, prep knife,  cooking spoon, pasta pot, sauce pan, serving bowl, and spoon to eat it all with). Which I think is pretty impressive considering its a well rounded meal with a vegetable.

  We've got a chicken breast (later cut into cubes), asparagus (later chopped), shallot (later minced), garlic (later crushed in a garlic press), whipping cream, Parmesan cheese, and my favorite noodles (at least for the month).


 First things first, I turn on my pans. First is the pot for the noodles, filled with water and a pinch of salt. Then it's my sauce skillet. Once the skillet is warm, add a little oil or bacon fat (I keep a cup of bacon fat on the stove just for this purpose). Add in your cubed chicken and season with salt and pepper. Cook over med-high heat until golden brown. 

When your water is boiling, add the noodles and cook as directed on package, or until al dente.

 Back to the skillet -reduce heat to medium and add your minced shallots and crushed garlic toss for a minute, making sure the garlic doesn't burn. Add in the asparagus and toss for another minute. Now add 3/4 cup cream (or something close to that amount, I eyeball it depending on how much sauce I want), let it bubble for a bit.


Once your noodles are done drain them. I'm spoiled and my pasta pot lid has a built in strainer so I don't have get out the stand alone strainer or try draining it with a normal lid (which I always loose noodles with).
Add the pasta to your sauce and toss it together. Throw in a handful or so of cheese and mix it all together, so the cheese melts and incorporates.


Plate up, sit down, and eat (the dishes can wait till later).


Monday, April 28, 2014

Broccoli cheese pasta Gluten free

I got home later than planned, dinner for me and Mr. Beam would have to be make quicker than I had wanted. We were hungry and both had had long days, I need something quick, filling and tasty.  I grabbed my Gluten Free noodles and started to boil water.

I love my Stainless steal pot, it has pour spouts in the side and  holes in the lid to allow you to drain what you cooked while still keeping it in the warm pan. I absolutely love it and use it for everything. It's an Emeril  Lagasse cookware pot (one of his older models) and it is awesome.

Once the water began to boil I added the noddles. 

In another pan I  heated up some butter and minced garlic, letting it cook before I added my cream.

When the noodles were halfway done I added my chopped broccoli to the pot, turned down the heat and put on the lid. This allows the noodles to finish and for the broccoli to get perfectly cooked without dirtying another pan (I also find it takes too long for broccoli to cook in the cream sauce)

I add my cheese to the cream sauce (Shredded Fontina in this case) and let the sauce get nice and creamy.
By now the noodles and broccoli are ready to drain and toss in with the sauce.


Ta-da! Quick, easy, and delicious :) 

Monday, April 14, 2014

Gluten free quick tomato soup and grilled cheese sandwich

Things have been busy around here. Both Mr.Beam and I have been working more and as a result occasionally get on opposite schedules (sometimes he works nights, while I work days). If we aren't having dinner together and I'm getting off work late  I don't want to cook anything, it all sounds like too much work, But as I sit on the couch relaxing my stomach gives a protest and I have to get up and make something, but what?

1- Something that is a serving for one, 2- That is healthier than just having cereal, and  3-something that is easy to make.

Grilled cheese sandwich and tomato soup fits all three criteria


Yes, my grilled cheese is a little dark, but I sometimes like it that way, and  the night that I made this was one of those nights.


The soup is rich and creamy  and you can see the steam coming out of the bowl! I took a small can of tomato sauce, put it in my small saucepan, added some half & half (a little less than what the now empty sauce can would hold), salt, pepper, and a little garlic power. I mixed it well and set it on the stove to heat up, stirring it occasionally (Basically when I was board waiting for it and the sandwich to be done). 


The sandwich was out of my Udi's multi-grain bread. You butter  both insides of the bread before laying out your slices of cheese ( I used Cheddar this time but I also love to use a strong Provolone) and then butter both outside pieces, first one side, then put that side down in your hot pan, then butter the top of the other.
I like to flip my Sandwich multiple times to make sure the cheese melts all the way without it getting to dark (I  had it on a higher heat this time, 1- because I wanted the dark flavor, and 2- because it cooked faster).

It was a delicious quick meal that kept my stomach happy and didn't keep me in the kitchen forever because it's super easy to make.


Wednesday, August 22, 2012

Cauliflower Pizza

As the restaurants in my area have started to offer a gluten free option for pizza I've turned into a pizza fiend. Pizza was one thing I truly missed being gluten free. With a gluten free pizza it's all about the crust. Sure toppings can vary but when I'm judging a pizza I'm truly interested in the quality of the crust. I've found some thin and crisp to some fluffy and almost pancake like. Once I find a crust I love I can play with the sauces, cheese and toppings and create my perfect pizza.


Pinterest yet again brought me something amazing during my pizza frenzy,  A gluten free, no-carb pizza crust. How you may ask? Using Cauliflower, egg and mozzarella cheese.  I decided it was worth trying out and used the first recipe I saw.


With this recipe you steamed the cauliflower before ricing it (no matter how long I cooked it I couldn't get it through my ricer, so I chopped it into tiny pieces), add the shredded cheese, egg and some spices, mix together and shape. The idea was to then bake it for 15 minutes, take it out, top it with sauce and cheese and bake for another 15 or so minutes.


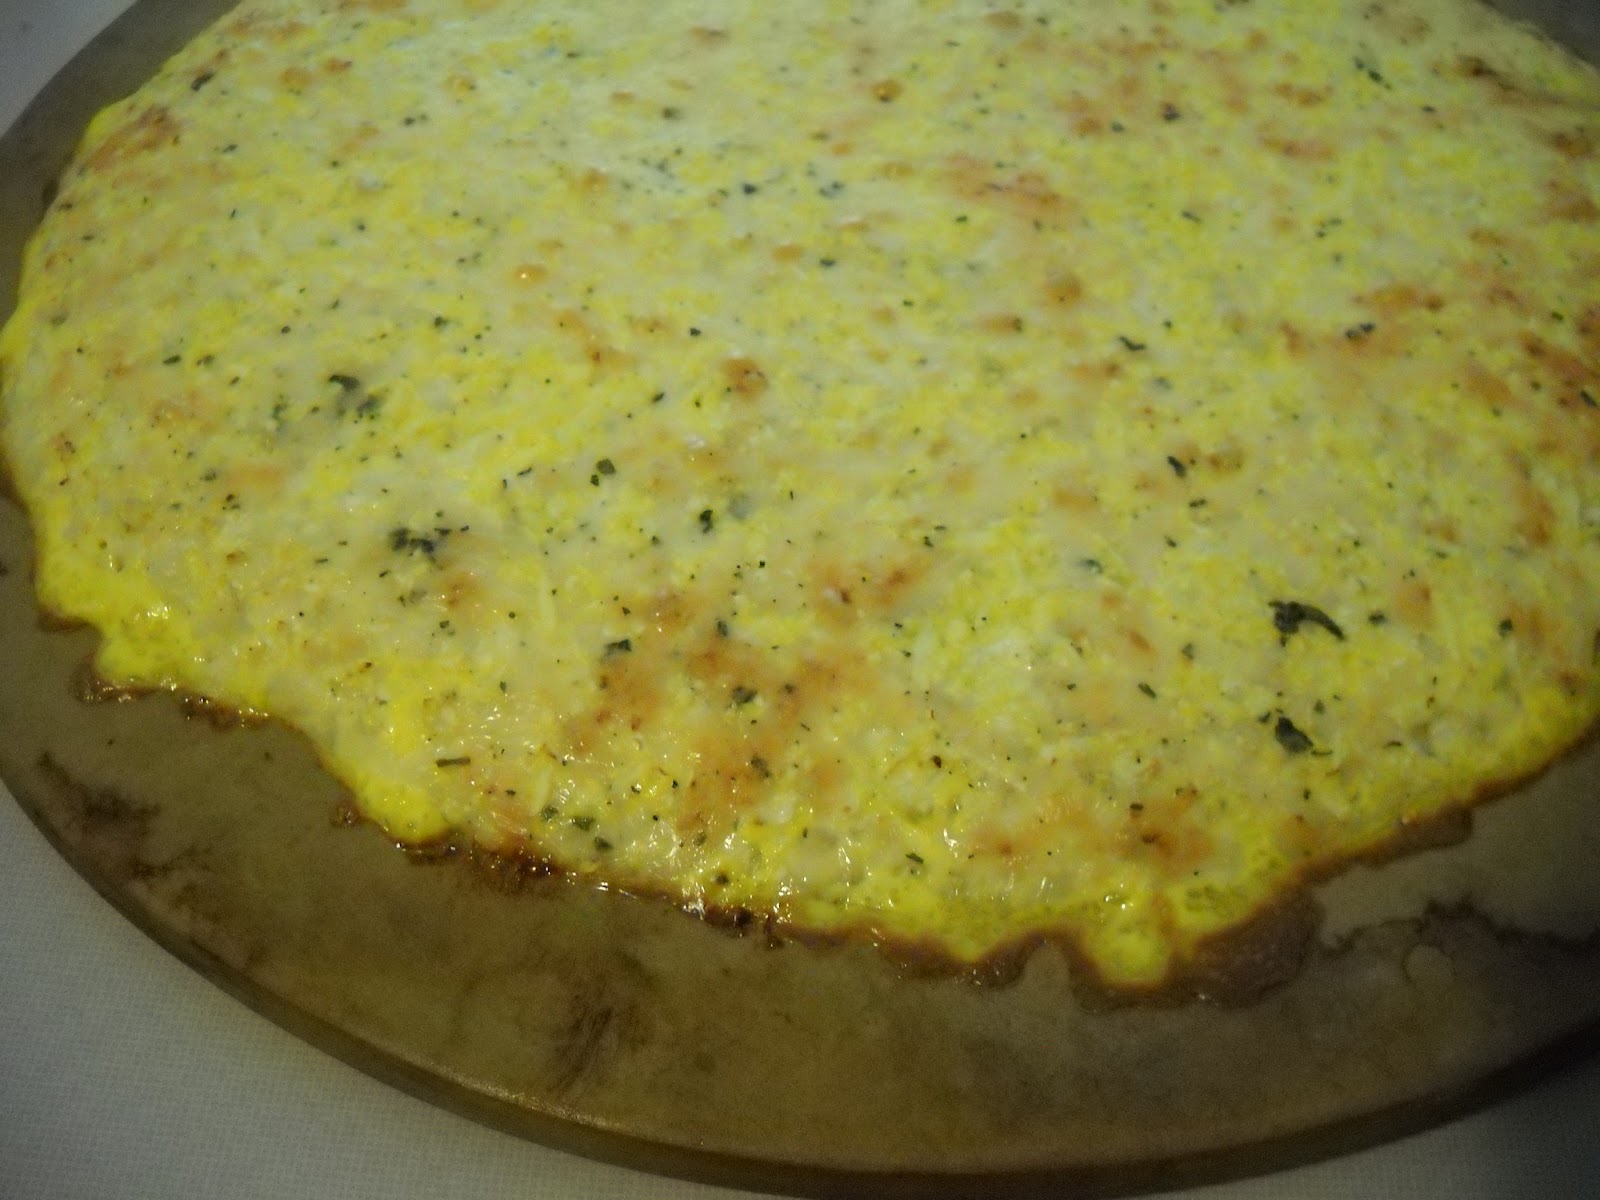
I think steaming the cauliflower is a mistake. It had so much moisture from steaming the cauliflower that the egg got running and it took extra long to cook.


Leaky edges or not, I was going to finish and eat this pizza. It was very mushy and had to be eaten with a fork but it did taste amazing and Mr. Beam and I ate the whole thing!

Round 2

We loved the taste of the cauliflower pizza despite its soggy and floppy 'crust', so two weeks later I decided to try again, with a slightly different recipe in hopes of creating  more of a pizza like crust.


Instead of steaming the cauliflower and ricing it, you just grated it raw on a cheese grater then added it to mozzarella, eggs and spices. This 'dough'  had more structure then the last attempt and looked promising.


The egg ran only a little this time and the crust kept it's structure. I also didn't have to cook it for as long.


I made my sauce with tomato paste, cream, spices, and my family trade mark to any tomato sauce; brown sugar. It helps even out the high acid flavor and gives it more depth, it helps make amazing spaghetti sauce.

I then topped it with cheese and baked it until melted and bubbly. Which seemed like forever, it smelled so good.


I could actually pick up the pieces with my hands and it held together, it wilted and wanted to fall with gravity but it wasn't falling apart on me. I made this on a night when Mr. Beam was working so despite my best efforts I could not eat it all. There were 5 pieces left that I covered in plastic wrap and put in the fridge. Mr. beam said it tasted just as good cold and even left me a small piece for lunch the next day. When I reheated it in the microwave it lost it's structure and would fall apart but tasted just as good, if not better, then the night before.

So even though it isn't the normal pizza crust i'm searching for it surpassed my expectations and found it's way onto my favorites list.


Saturday, July 7, 2012

An Easy Breakfast

Breakfast is supposed to be the most important meal of the day, but lately I'm so sluggish in the morning I don't feel awake enough to make anything and settle for a handful of almonds until I'm extremely hungry  which can happen from 40 minutes to two  hours later. It's bad I know but some days I cannot help it. When I began researching for planning my meals I stumbled on a recipe for making your own breakfast sandwiches and freezing them. http://www.theyummylife.com/Egg_McMuffin

 I got pre-made Gluten free bread for mine and I used blueberry English muffins for Mr. Beams (they smell like heaven). I used cheddar cheese and Canadian bacon and I got extra eggs from my parents (I love farm fresh eggs!)


I did not read the up-date on their website about cooking the eggs, so the first time I made them my eggs were small and a little deformed, but they worked. I made these again recently and used my creme brule containers as well as a few of their other tips and the eggs turned out better.

While my eggs cook in the oven I slice the cheese and toast my bread (if your only going to reheat them in the oven you don't need to toast if before hand, but I suggest it for when reheating in the microwave for the bread to have a better flavor and texture)

When the eggs are done I start assembling them...

(this picture was from my very first batch when the eggs were really small and thick, after using the other pans and breaking the yolk before cooking the eggs fit much better)


When they were all assembled I wrapped them individually in wax paper and stacked them in a cheap foil baking dish and covered them with foil so they would stay nice and tidy in my freezer.
After breaking it down each sandwich cost me roughly $1.27. If I needed to make more than a dozen I could probably buy in bulk and reduce the price even more, but with just me and Mr. Beam 6 sandwiches each is perfect :)

Tuesday, June 5, 2012

Bisquick biscuits

 I'm beginning to love Gluten free Bisquick. I usually have it in the cupboard to make waffles with but the other night Mr beam wanted biscuits with dinner and instead of mixing my own flour mix I grabbed the Bisquick.
I made cheesy garlic biscuits. I gotta say I was impressed with how they turned out, with a little tweaking they could taste just like the red lobster biscuits.


Tuesday, May 29, 2012

White beam chili

 I've had this craving for chili for over two weeks now.  A week ago I bought all the stuff to make my white bean chili but between work and other things I wasn't able to make it and the past few days we had a friend staying with us and she can't even look at chili with out getting grossed out, so chili was a no go. I now have a free day, Mr. beam is working and I am by myself for the rest of the night, chili? I think yes!


We  have some hominy, white beans, green taco sauce, sour cream, monterey jack cheese, chicken stock, chicken, salt, pepper, coriander, cumin, garlic, onion, celery and corn.


 I drained and rinsed the hominy and white beans. Shredded the cheese , cubed the chicken, and chopped the onion, garlic, celery and corn (well I didn't chop the corn I took it off the husk).


I  cooked the chicken then added the onion, garlic, celery, and corn and let the onions sweat.


 I then added the hominy  and beans and mixed in the green taco sauce.


Then I added the Chicken stock and spices to taste. Once this was done I let it simmer until it became a chili consistency.  To serve I dollop with sour cream and top with the shredded cheese, if I had them I would of also crunched up some tortilla chips in there.

 If you like really spicy chili you'll have to add more of a kick to this. I cannot have a lot of spice (even this mild stuff doesn't sit  very well with me) adding more fresh peppers and change the cheese to pepper jack will turn up the heat a bit :)


This makes way to much for one person to eat so I put some in the fridge for the next day and  some in the freezer for when my craving hits again :)


Thursday, March 29, 2012

Onions

A few weeks ago I had a huge craving for onions, but not just onions, caramelized onions. Now there are not many foods that I won't or can't cook with, I let Mr. Beam have gluten in the house (He lives here too after all) and  I don't have any peppers or eggplant in the kitchen (as I can't have them) but we generally don't have any onions in the house as Mr. Beam cannot eat them. It's been hard cutting onions mostly out of my diet, they are part of the holy trinity in cooking after all. On the rare occasion we eat out I will indulge, or if I'm making soup I can use leeks or green onions, I just can't use any bulb onion or shallot without Mr. Beam having stomach problems.  I love onions but refrain from using them when Mr. Beam is home, it's like how he won't eat taco bell or chips ahoy cookies around me because I can't have them. After a couple of days my craving for caramelized onions grew stronger, thankfully Mr.Beam started working nights that day. :)

On my way home from work I picked up a yellow onion, I put on my playlist of songs and started prepping  my onion filled dinner. What better way to have caramelized onions than in onion soup? It had been grey and rainy out for days and soup sounded perfect.


I looked in my fridge and remembered I also had mushrooms (shiitake and black trumpet) that needed to be used. Caramelized Onion and Mushroom soup? Yes please. After chopping everything it was time to caramelize.  Now to caramelize you can't have the pan to crowded or the heat to high so I had to do it in several batches. 


Thankfully I was finishing a book by the Gluten Free Girl, so I sat on the counter, listened to my music and read, stopping to stir the onions or mushrooms occasionally until they were beautifully golden. It took me over an hour because of how much I was making, but I was able to finish my book, (which I highly recommend even if you yourself aren't gluten free)


It was one of the most relaxing nights I've had in a while, I always seem to forget just how much I relax when I'm in the kitchen. Life seems to just get so busy, always on the go with something to get done, in the kitchen it's like time slows down, the rush of everyday melts away in my kitchen, at least when I'm cooking, doing dishes not so much.


 I de-glazed the pot with some white wine before adding the onions and mushrooms back in.  I then added some vegetable stock, herbs and garlic and let it simmer for a bit.  It was amazingly simple to make and has few ingredients for it's depth in flavor. I simply grated up some white cheese (I think it was Gruyere) and toasted some GF bread to go with it. It was the best onion soup I have ever tasted :)


Saturday, January 28, 2012

Tasty Success

Seeing as my 'sweet' gluten free recipes were not working out last week I decided to take a break from them and work on something savory. Last week I had made a Gluten free sandwich bread and with the left over end of it I made bread crumbs. My mind was pondering what goodies I would make using them, chicken strips? no. homemade mac and cheese? no. Nothing I thought of sparked my interest so I hopped on Pinterest and looked through the food and drink category.  I found mozzarella sticks, not only that but the recipe was for GLUTEN FREE mozzarella sticks. My taste buds were watering as I read the directions. I had everything needed to make them and began setting everything up. Now because I've been doing this blog I've really been trying to do two things; 1 take pictures as I cook so I can share them on here and 2 write down the recipe. I eyeballed everything for this recipe but I did remember to take picture! lol

 Above I have my mozzarella cut into sticks, my rice flour and seasoning mixture, my egg wash, my bread crumbs, and a few sticks that already are coated. The KEY to making these work is dipping them twice in the two first bowls before rolling them in the bread crumbs. It fully coats the cheese enough to  let them get all melted without seeping out, I noticed on some of mine where they didn't get a good second coat they started to leak. So remember, roll in rice flour, egg wash, rice flour again, egg wash again and then coat with bread crumbs.

Make sure your oils nice and hot, these guys don't need that long for them to melt the inside and brown the outside.

Ta Da! The finished product with some marinara sauce to dip them in :) let me tell you they were yummy! :)
To give credit where credit is do this is the site that has the recipe   http://www.seriouseats.com/recipes/2011/04/gluten-free-tuesday-mozzarella-sticks.html