Showing posts with label Family. Show all posts

Sunday, March 1, 2015

New beginnings

I've got some exciting news! I will not be posting in Adventures in Gluten Free Cooking anymore, because I have set up a new blog  A Stray Kitchen.  You'll still find the same great recipes but I'm stepping it up a notch and taking my blogging more seriously. I'm currently working on  recipes and improving my food photography. I'm taking  bigger baby sets, but my ultimate goal is to have a professional food blog and E-book cookbooks.

Please head on over and check out A Stray Kitchen and let me know what you think!


Thursday, December 4, 2014

Blush Spaghetti

My house was about to be crammed full of guys. We occasionally host a game night at our house, but I didn't know until they started arriving that my brother had promised them food. What do you feed a bunch of hungry guys, and quickly? Spaghetti. It's easy, tasty and I usually have everything I need to make it.


I ran into the kitchen, gathered my ingredients and realized I had heavy cream, I was going to make my favorite spaghetti, blush spaghetti. Why? Because I love the creaminess from the heavy cream and how it mellows out the acidic bite from the tomatoes. If it's an option I always make it over regular spaghetti.


Here's a run down on the ingredients. 
Ground beef, tomato sauce, brown sugar, red wine, garlic, onion (leeks), parsley, cream (not pictured) and Parmesan cheese. Also have your favorite Italian herbs, I just added a pinch of Marjoram and Thyme to this sauce.


 First start a pot of water to boil. I add a little salt and some olive oil to mine before I begin making the sauce.
Now that your noodle pot is getting ready, brown that beef and pour off the extra fat. Once that's done add in your onions and garlic. Let it cook for a few minutes so they soften. Then add your red wine, only a 1/2 cup or so and let it cook down before adding in the tomato sauce.


At this point you can add your brown sugar (to taste, I like a little more in mine to add depth and to  counter the acid in the tomatoes), also add in your Italian spices. The basic spaghetti sauce is now done. You could just serve it as is over noodles, but there's only one more step to make this a blush spaghetti and your taste buds will love you for it.


Pour in the heavy cream...I did around a 1/4 of a cup worth.


Mix it all together, so the red becomes pink.

I let this stay at a low simmer until the noodles are done. I had very little actual spaghetti noodles so I used rice noodles instead. Once they were cooked al dente I drained them, tossed them with the sauce, and made sure everything got thoroughly coated.


Grate some Parmesan cheese over the top, sprinkle with fresh parsley and you're done. Everyone got second helpings (I also made a salad) and the only complaints I got were they were too full to eat anymore (but somehow polished everything off). Silly boys.


Monday, November 17, 2014

Gluten Free Stuffing for the holidays

The holiday season is closing in fast, are you ready for it?
The holidays can be hard when you have to eat gluten free and are visiting relatives and friends (Mr. Beams family still doesn't get it entirely) but if bringing or making your own food is an option, I've got a recipe that you might enjoy.


I keep my gluten free bread in the freezer and I know I can't be the only one that gets slices that break into pieces or the ends are too thick for sandwiches. I keep these odd ball pieces in the side pocket of my freezer door and use them to make stuffing, bread crumbs, and anything else I can think of. If you don't have any of these laying around, you can use a fresh loaf. 


I arrange all my  reject sandwich bread on a tray to thaw. Most of these are end pieces that were volunteered for stuffing duty. They don't all fit on my tray and I've over lapped them a bit, but I make sure to move them during the cooking process to make sure everything gets nice and toasted.


Here's a close up of my broken bread, it's perfectly good, save for the fact that it broke into a smaller piece. The bread is mostly thawed at this point (you can see the melted puddles of frost on the tray).
I heated the oven to 300F and put them in.


After 10-15 minutes they should be nicely toasted (for thicker pieces you'll have to turn them over half way through baking or one side will be crunchy and the other will be soft). When they were cool to the touch I broke them into smaller bite size pieces.


 While you're waiting for the bread to toast, prepare your other ingredients.  Stuffing recipes vary greatly, some add dried fruit, while others add the gizzards from the turkey, my recipe however, is on the plain side, and I never have any leftovers.
Chicken stock, diced celery, chopped leeks, minced garlic, chopped parsley, and spice mixture (salt, pepper, celery seed,  ground coriander, garlic powder and onion powder).


When the bread has been cooled and crumbled, combine with the other ingredients, Making sure the bread absorbs the liquid (I show having just over a cup of chicken stock, but while I was mixing the bread I added water to insure there was enough moisture). When it's all mixed together lightly pack it into a baking dish and bake at 350F until golden brown.


Once it's golden, set it on the counter to cool. I usually serve mine warm but it's also great cold.
I make two batches every thanksgiving. One for Mr. Beams side of the family and one for mine (we eat like hobbits during the holidays).

Happy Holidays and Good Eating!


Thursday, September 4, 2014

Fish tacos

I've been having Tacos a lot lately. I've always had at least one Taco Tuesday a month for as long as I can remember. Not only are Tacos easy, they are versatile, you can pretty much fill them with whatever you want.  When you have Tacos as often as I do, you can get board with the same old fillings. So every now and then I spice things up a bit and try something new.
 After an experience with some pretty bland fish tacos at a pub, I decided to make my own, and they would be flavorful.


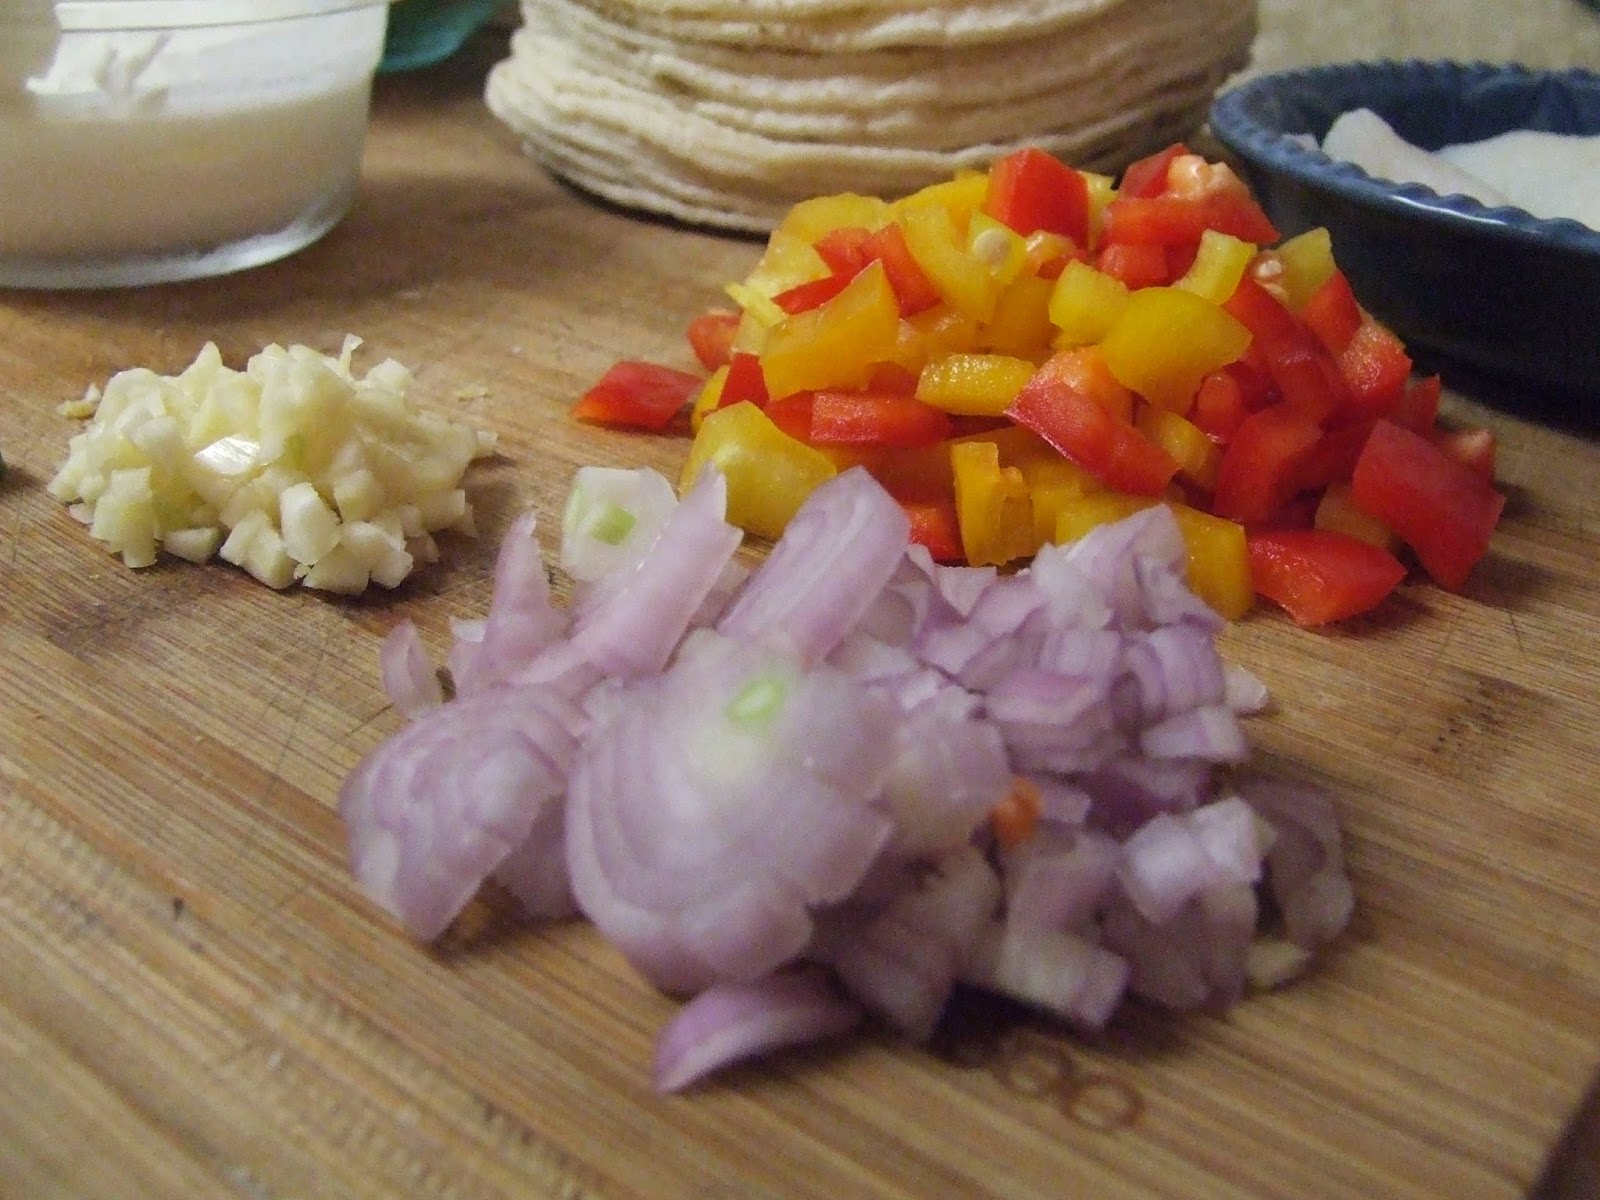
I was playing off the fish tacos from the pub, which inside a corn tortilla was Cod, sauteed onions and peppers, topped with dry cabbage... it fell short of my expectations and really lacked in flavor.  I decided that I was going to turn those ingredients up a notch. I have Cod, bell peppers, shallot, garlic, lettuce, celery, carrot, cheese, sour cream, and lime all prepped and ready to turn into something yummy!


I chopped my Bell peppers up small along with the garlic and shallot. I find that if peppers are kept in long slices (think Philly cheese steak style) they are harder to eat and more of them end up forgotten on my plate than in my stomach.


I had Tillamook Cheddar cheese on hand. Otherwise I would of gone with a feta or something more pungent, I really like pungent cheese with my tacos.


In this bowl I have some leaf lettuce cut into shreds, celery thinly chopped, and grated carrot. This is the veggie base for my slaw. I did not have any cabbage on hand so I used the lettuce instead.

I set up the ingredients like this not only so I can get good pictures, but also because it is easier to cook this way, and defiantly easier when it comes to clean up. 


I sauteed the peppers, shallot, and garlic with some oil until everything was tender and the flavors had a chance to merry.


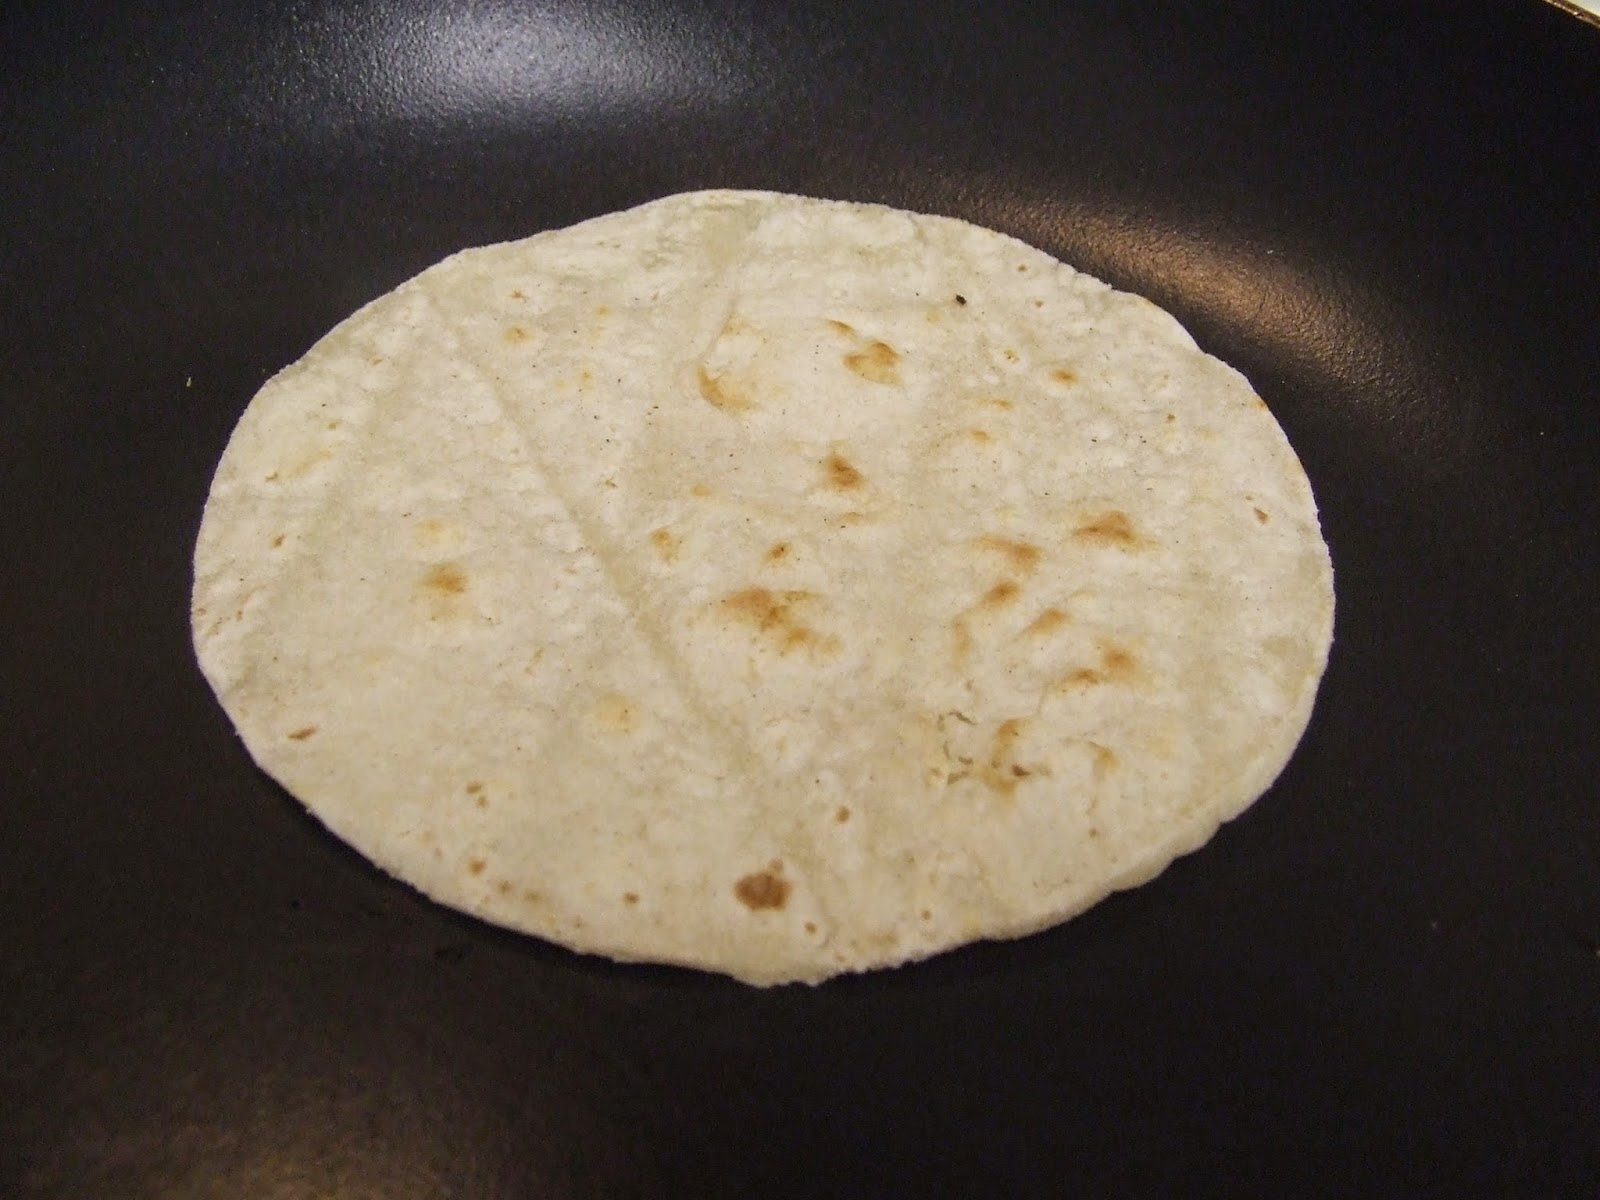
Decide on how many tacos you're going to be making and set aside the amount of corn tortillas. I put a skillet on high and I brown each side. They will get a little stiff and crunchy, don't worry, as you stack the ones you've already done the moisture content will soften them again, allowing you to fold them into tacos.


In this picture my tortillas are browned, my fish has been cooked and broken down into smaller pieces, my pepper mixture is done, cheese is grated, and I made my slaw. I mixed some sour cream in with the vegetables and added some spices.


Here's a close up of my fish and sauteed veggies. I decided it would work better if I completely mixed these two together before assembling my tacos.


One taco complete.


Looks like dinner is served!


Saturday, August 9, 2014

Accidents and feeling betrayed....

My day job had me working longer hours than normal, I wasn't eating as well as I normally do and the heat was taking it's toll on my body. They sent me home early one night, knowing that I wasn't  feeling well, and I went to the store and got electrolyte powder and a probiotic to help me bounce back, I needed to take better care of myself. I walked like a slug around the store, my head was pounding and I couldn't think straight on what I wanted, I ended up walking down all the isles twice. The next day I felt worse, my joints hurt, I couldn't look at bright lights, and my stomach wasn't happy, but pushed through it and worked anyway. The next morning I could hardly get out of bed and had slept 9+ hours. Something wasn't right. I grabbed my probiotic and while pouring myself a glass I read parts of the label. Funny, it didn't say gluten free like it used too. I stopped pouring and turned the carton around, it stated that it was dairy-free, soy-free, and vegan. My head was foggy and I squinted at the tiny print below (and I mean tiny, it's the smallest print on the entire carton, I don't need glasses but found it hard to read), "This product contains low levels of gluten from organic oat flour and barley malt".

When I thought I was taking care of myself I was actually poisoning myself.
I was so angry. Yes, it ultimately was my fault, I should of read the label and it's teeny tiny print, but I felt betrayed. I had bought this probiotic before and it had been gluten free. In my foggy state at the store I grabbed things I recognized as being safe, I just wanted to feel better.

In the tiny print, just below where if informs you of the gluten is also states 'Try our new gluten-free quarts with green caps!"

Sorry, I don't think I can ever trust your product again. Even if it has a green cap this time.

Thursday, August 7, 2014

Kitchen visit, trout, calamari and sauteed beets


In my last post I shared the wonderful Ice Cream Cake I make with my cousin Emily while I was on vacation. In this post I will share the rest of our meal. Just keep in mind that we shared cooking duties so I don't have as many pictures of the cooking process... actually I'm missing a lot of photos I would normally have, but I was on vacation so we're making due with what we have.


The second day of my mini vacation Emily and I decided to take it easy, lounging around the house watching movies and cooking. To some people I'm sure cooking on their vacation is out of the question. Your relaxing, why not order a pizza, right?
Emily and I both enjoy cooking, even more so when we are together, sharing recipes and new ingredients. As kids we were always hanging out in the kitchen during the holidays, not only to sneak into food, but it was our hangout spot. It's where the magic happened. The kitchen was always loud, most of it from laughter. Cooking is a comfort for us and not necessarily because we get to eat it afterwards.


A whole rainbow trout.

Emily loves fish but had never prepared one whole before, or grilled it on a BBQ, so I decided to show her my favorite way to make rainbow trout. We started out with the whole fish, like in the picture, I showed her how to trim the fins and made sure it was clean on the inside. I raided her cabinets for Italian spices and salt and mixed them together in a little bowl. It had basil, oregano, thyme, onion powder, garlic powder, salt, and ground pepper in it. I got it as close to the Italian salt rub I had at home (which I got at whole foods last year and love, But I haven't been able to find it again), It smelled like the beginnings of a pizza. I sprinkled my herb mix inside the body cavity of the fish and then wrapped the whole thing in aluminum foil. It was put on the grill while we cooked the rest of our meal. Sadly this is the only picture of the trout. We got so hungry by the time everything was done that we forgot to take pictures. It was perfectly cooked and I showed Emily how to remove the bones while keeping  as much of the fish intact as possible.


Sense being diagnosed with Celiacs Emily hasn't had some of her favorite foods. Most are not pre-made gluten free or are very time consuming to make yourself. Emily had not had Calamari in over 4 years. I was going to change that.
The hardest thing about making Calamari? 
Finding the squid. Most local stores have certain seafood staples and squid isn't usually one of them. Thankfully Whole Foods  tends to carry it, both the whole head/body (for stuffing) and pre-sliced into rings, which is perfect for Calamari.
You make it just like you would breaded chicken, dip it in the egg mixture, then rice flour, then back in the egg, then to the bread crumbs. Make sure it gets a nice coating of each layer.


All breaded and waiting for the fry oil to be hot enough.


Golden, delicious, and cooked just long enough. If you cook then too long they get really chewy.


Now I can't have Calamari without tartar sauce,  it's just wouldn't seem right to me without it.
The problem? Emily doesn't use mayo, she doesn't like it. Thankfully she had a vegan-mayo substitute. Normally I don't touch stuff like that, I prefer having as minimal processed food as possible, the ingredients in this stuff is processed before it is even processed into a vegan-mayo.  Anyway, I stubbornly wanted my tartar sauce and used it. We had gotten young garlic at the store, the kind with the bulb and the green stalk. I had never eaten it before and wanted to try it, so I chopped some up and put it in the vegan-mayo, along with some dill and pickles. It was oh so yummy with the Calamari. 


With all the seafood, we needed our vegetables, so I chopped up some golden beets, more of the young garlic and added the leftover Italian spices from the trout and I sauteed it all. The picture above is from before it all was cooked, once this was done we became ravenous animals and no more pictures where taken.

Thursday, July 31, 2014

Gluten free Ice cream cake with caramel sauce

We often indulge when we are on vacation, don't we? I had gone up to Lynnwood, Wa, to visit my cousin Emily and we decided to treat our selves. This is one of two posts I have from the trip, but this one is the sweetest one and I like dessert  first whenever possible.

Now my photo recording isn't the greatest this time. We shared the cooking duties so I mainly have  pictures of making the caramel sauce, because that was my job. Emily made the whipping cream and assembled the sandwiches.  We cheated a little and bought pre-made Ice cream cookie sandwiches made by Julies Organic. 


I cooked down some organic sugar and butter... which took awhile on her stove. I had to constantly keep stirring, letting it all melt and cook down.


All melted, but not done in this picture, after this I put in a little cream  and continued stirring. It took about 20 minutes total from start to finish.


Emily whipped the cream in her kitchen aid, which is located right next to the stove, so I was able to take pictures.


When the whipping cream was done Emily took the sandwiches (3 of them,  4 sandwiches come in the box but her boyfriend had already eaten one, he could wait), she split one of the sandwiches in half and put each half on a whole cookie, that way they looked like a layered cake. She then covered them with whip cream, just like you would frost a cake. When they were done she put them in the freezer. 


When the caramel sauce was done, I let it cool for a bit before drizzling it over the cakes.
We were good and the cakes stayed in the freezer until after dinner.


These cakes were rich and almost too big for us to eat (I'm sure they aren't meant to be one serving anyway, oops). The whip cream balanced out the sweetness of the caramel and ice cream nicely. It was a perfect treat for my vacation


Could you say no to eating that?


Monday, March 31, 2014

Gluten free Inside out Tacos

In a previous post I talked about making chicken stock from scratch. In that recipe, after the bird had cooked, I removed the meat from the bones before returning the bones back to the broth for longer cooking. The meat was saved for dinner that night. The chicken I had used was an older bird before she was put in the freezer, so her meat needed to be boiled a while before ready to eat, otherwise the meat is too tough.


Inside out tacos are super easy and quick to make, especially if the meat is already cooked, like what I did here.

In the red bowl is the chicken meat seasoned with cumin, ground coriander, salt, and pepper.
In the pot is my black beans cooking down.
To make the taco 'shells' you take the larger outer leaves of romaine lettuce, the big ones and the curved ones work nicely, but leave the really small inner leaves as they tend to be #1 small, and #2 bitter. Wash the lettuce 'shells' well and let dry.
Lastly I shredded some Cheddar cheese and got out the sour cream.


I layer it with beans, chicken, sour cream then cheese but that's just me. You could also cook up some other veggies like bell peppers and add those in.
It's a fast, easy, and tasty dinner.

Monday, March 17, 2014

Chicken stock from scratch

One thing I love having on hand is chicken stock. I have that 'Better Than Bouillon' stuff  that I keep on hand, I like the beef, and vegetable  as well as the chicken  flavors (I've been meaning to try the mushroom but haven't yet and after setting up that link I saw a clam and lobster flavor, yum!).
But I really love having homemade stock on hand, partially because I love the fat content, the little golden puddles that top the broth. When someone is sick I use this broth to make them a soup,  I feel it works better than store bought, no matter how good the store bought is.


The last chicken from last summers butchering. I also had some scrap pieces  of chicken from when my dad gets a 50lb box of chicken breasts from the restaurant supply store, there tends to have  unwanted fat and tendons on some of them so we clean them up before dividing them into smaller portions and putting them in the freezer. We keep those scraps to make stock and gravy.


Here is the scraps cooking in my cast iron pot. I use this pot because of the wonderful caramelization  I can get with it. 
I just tossed them in the hot pan with a little olive oil and salted them. (Hot for a cast iron like this is Medium, you don't want to use the high setting with cast iron, it's gets plenty hot on Medium, trust me).


About half way done  before I  put in the water and the whole bird. I really want these pieces to get that golden color as much as possible.


What the bottom of the pan looks like after I took out the scrap pieces. (I cooled them and used them as dog treats. Waste not, want not and all that, Layla loved it)


This is just adding water and the whole bird to the pot. Look how golden it is already, and those puddles of fat, yummy. I let this simmer for 6+ hours total, refilling the water twice. The first time I took the bird out and  took off it's meat for dinner later that night, I returned the bones back to pot, filled it with more water and let it simmer some more. The second time I removed the bones and added more water, I wanted more broth than what was in there. When it was the right rich flavor I poured it into a pitcher to cool.

Any meat or other solids will sink to the bottom, the stock is in the middle and that gorgeous fat floats to the top. Once this was cooled I filled ice cube trays and put it in the freezer.  I like having the small cubes of stock to add to sauces and vegetable dishes. If I have enough stock I will also put it in large ziplock containers to go in the fridge, that way when I need to make soup I just pull it out to thaw or add some really hot water to melt it. I tend to dilute the stock with hot water so when I'm cooking it down I make sure it's extra strong so when I add the water it doesn't lose it's flavor.


Monday, March 3, 2014

Homemade Tomato Sauce

I miss summer.
I'm itching to start gardening again and have been planning it all winter, dreaming of warmer days and  green things growing. 
Last year was the first year I fully had a garden, before I helped my mother or had one or two plants that I looked after. Last year I learned a lot about gardening and have started expanding the gardening beds to allow for all the things I want to grow this year.

One thing I grew last year, and grew well, were tomatoes. Last spring all my starts died from a uncommon late frost. I was super discouraged (and not just because of the starts, last spring was rough on my family for a few reasons) and I didn't start any more seedlings. One of my mothers friends (who also works with my dad) heard what happened and donated all her extra tomato plants to us, she gave us 12 plants of different varieties, we had several orange and yellow cherry tomatoes, some marzanos, and some heirloom varieties.
Her kindness and generosity along with those bring green plants in the garden created an inspiring new start for us. We bought more starts from local farmers markets and a few from a chain store. Beans, broccoli, beets, eggplant, cucumber, zucchini, and Swiss chard took over the empty garden space. The tomatoes flourished and soon I had too many for us to eat (12 plants was a lot come to think of it lol) our friends and neighbors shared in our bounty but we still had a surplus of tomatoes. 


Tomato love!


I learned last summer that you should pinch your tomato plants once they get as big as you want them (pinching off the new growth), otherwise you end up with a tomato forest and it take longer to get tomatoes because the plant is still focusing on growing instead of ripening the fruit (I would of had even more tomatoes if I had pinched them so it was kind of a good thing that I didn't)


This was one day of harvest, some days it was more, some days less, but this was a normal amount.
What to do with all  those tomatoes? Make tomato sauce of course!


I was naughty with this batch and used a bulb onion instead of leeks, I also minced some garlic.
After letting that saute in some oil I added the tomatoes to cook down.


Normally you blanch the tomatoes first so you can remove the skin but with these cherry tomatoes I kept them on.
I added a little salt to pull out the flavors and then I took the emulsion blender to it to chop up those skins. Later in the  summer, when I was harvesting the last of my tomatoes I made more tomato sauce, separating each kind of tomato into groups. The cherries, the marzanos, and the Heirloom all made different tasting tomato sauce. Out of all of them I liked the cherry the  best, even though marzanos are in the tomato category for sauce making and cherries are not.
I canned these sauces and have been enjoying that taste of summer all winter. It was the first time I've ever canned anything, I've always watched my mother can things but never took the plunge myself. I am now collecting jars and lids so I can can more next year.


I cooked down the Cherry tomatoes to make a paste (on the sides) and kept the marzano/heirloom a sauce (in the middle). There are what I had left by January. It was a great way to taste summer again after all the cold gray day of winter.